MDF Wall Panelling Ideas: Styles and Installation
MDF wall panelling styles compared, with practical guidance on Shaker, board-and-batten, geometric and full-height options for York homes.
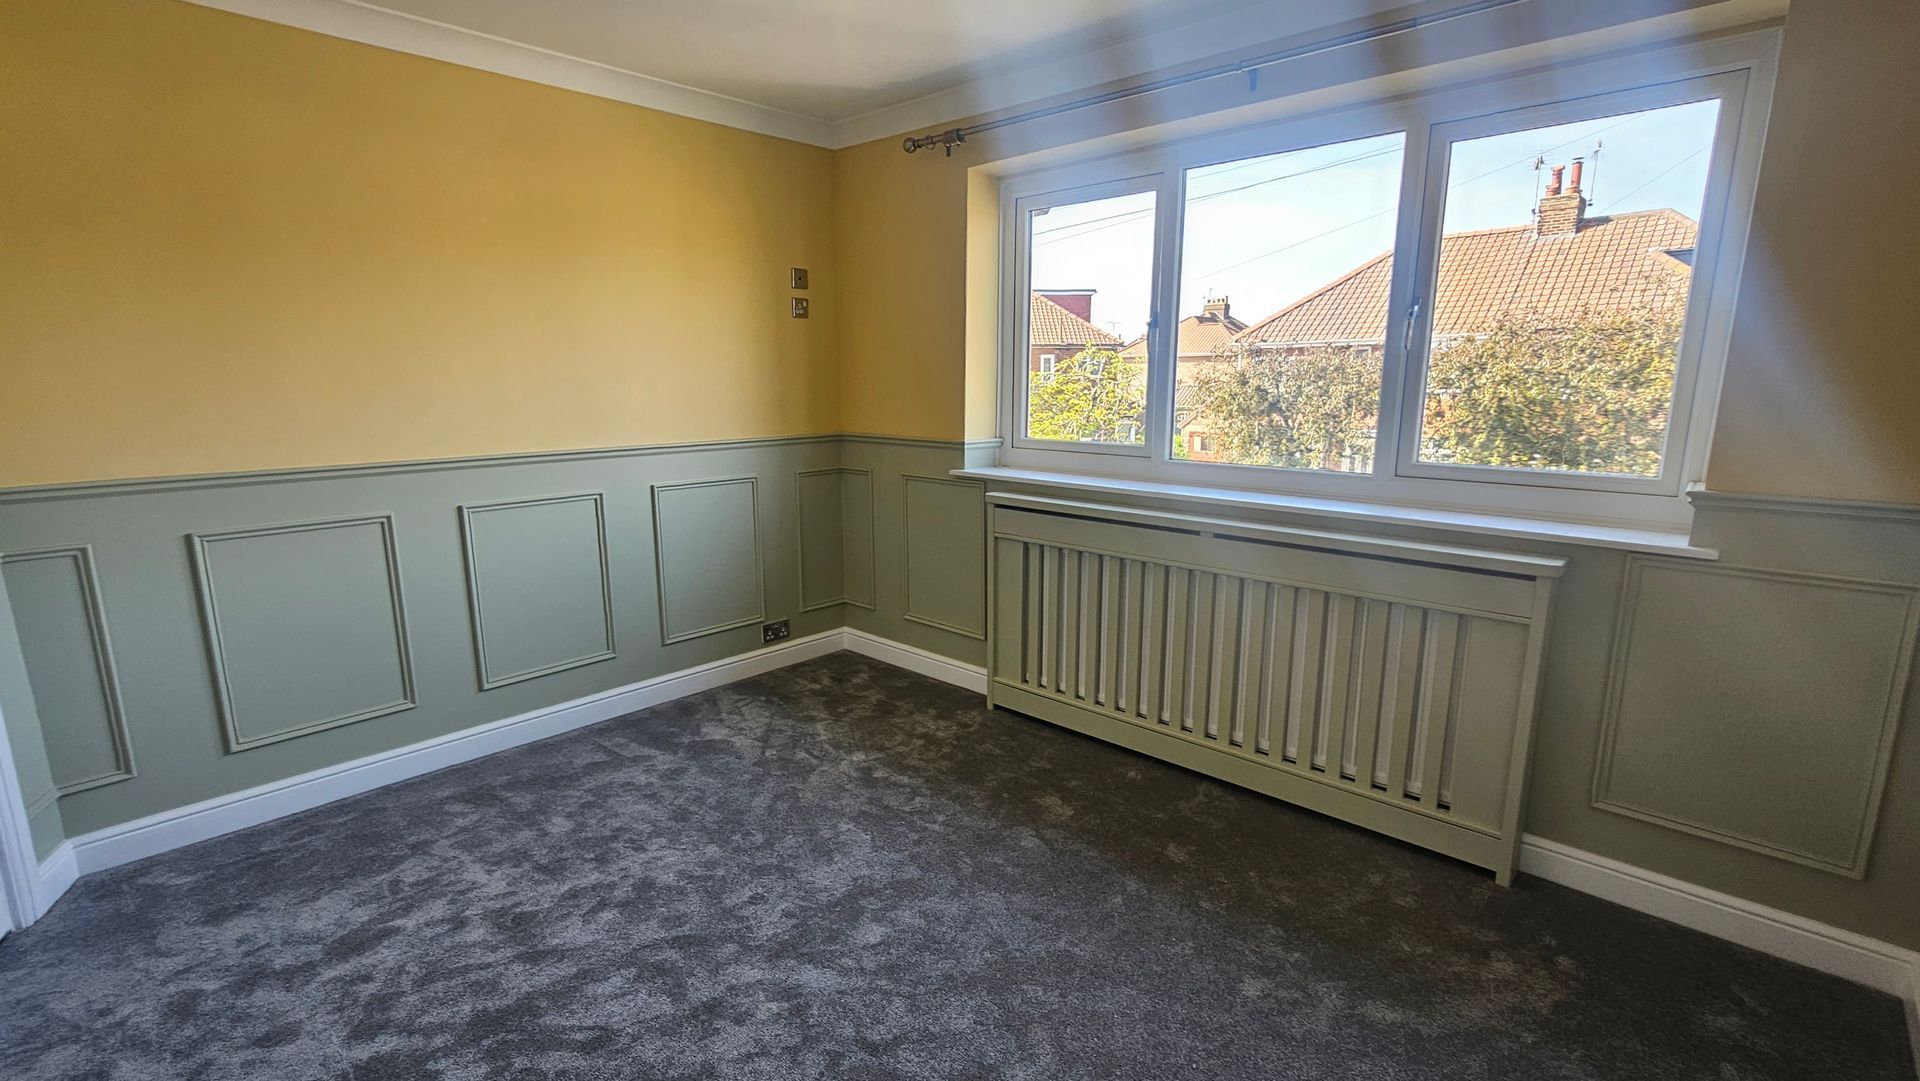
MDF panelling now appears in period and modern homes alike. The styles range from genuinely traditional to fairly experimental, and the finished look can be more affordable than people expect.
The catch is that bad panelling looks worse than no panelling. Wonky joints, poor mitres, skirting that doesn't line up with the bottom rail, paint runs in the shadow lines: any of these reads loudly because the eye expects panelling to be crisp. Done well, it adds depth and craft to a flat wall. Done badly, it draws attention to itself for the wrong reasons.
Why choose MDF for painted panelling
Three reasons MDF dominates modern wall panelling: price, paintability, and stability.
Price first. Primed MDF is usually more affordable than solid timber alternatives such as pine or tulipwood. Across a full-height panelled wall, that material difference can be substantial, which is one reason MDF is widely used for domestic installations.
MDF's smooth, consistent surface takes a painted finish well when the cut edges are sealed and the surface is prepared correctly. Eggshell, satin or a sprayed finish can all produce a crisp result. The right preparation and coating system matter more than promising that one material will always look factory-finished.
Stability matters because panelling covers large wall areas and every joint remains visible. MDF is generally more dimensionally consistent than natural timber, although sound fixing, acclimatisation and moisture control still matter. Bathrooms need moisture-resistant MDF or another specifically rated panelling board rather than standard MDF.
Style one: Shaker
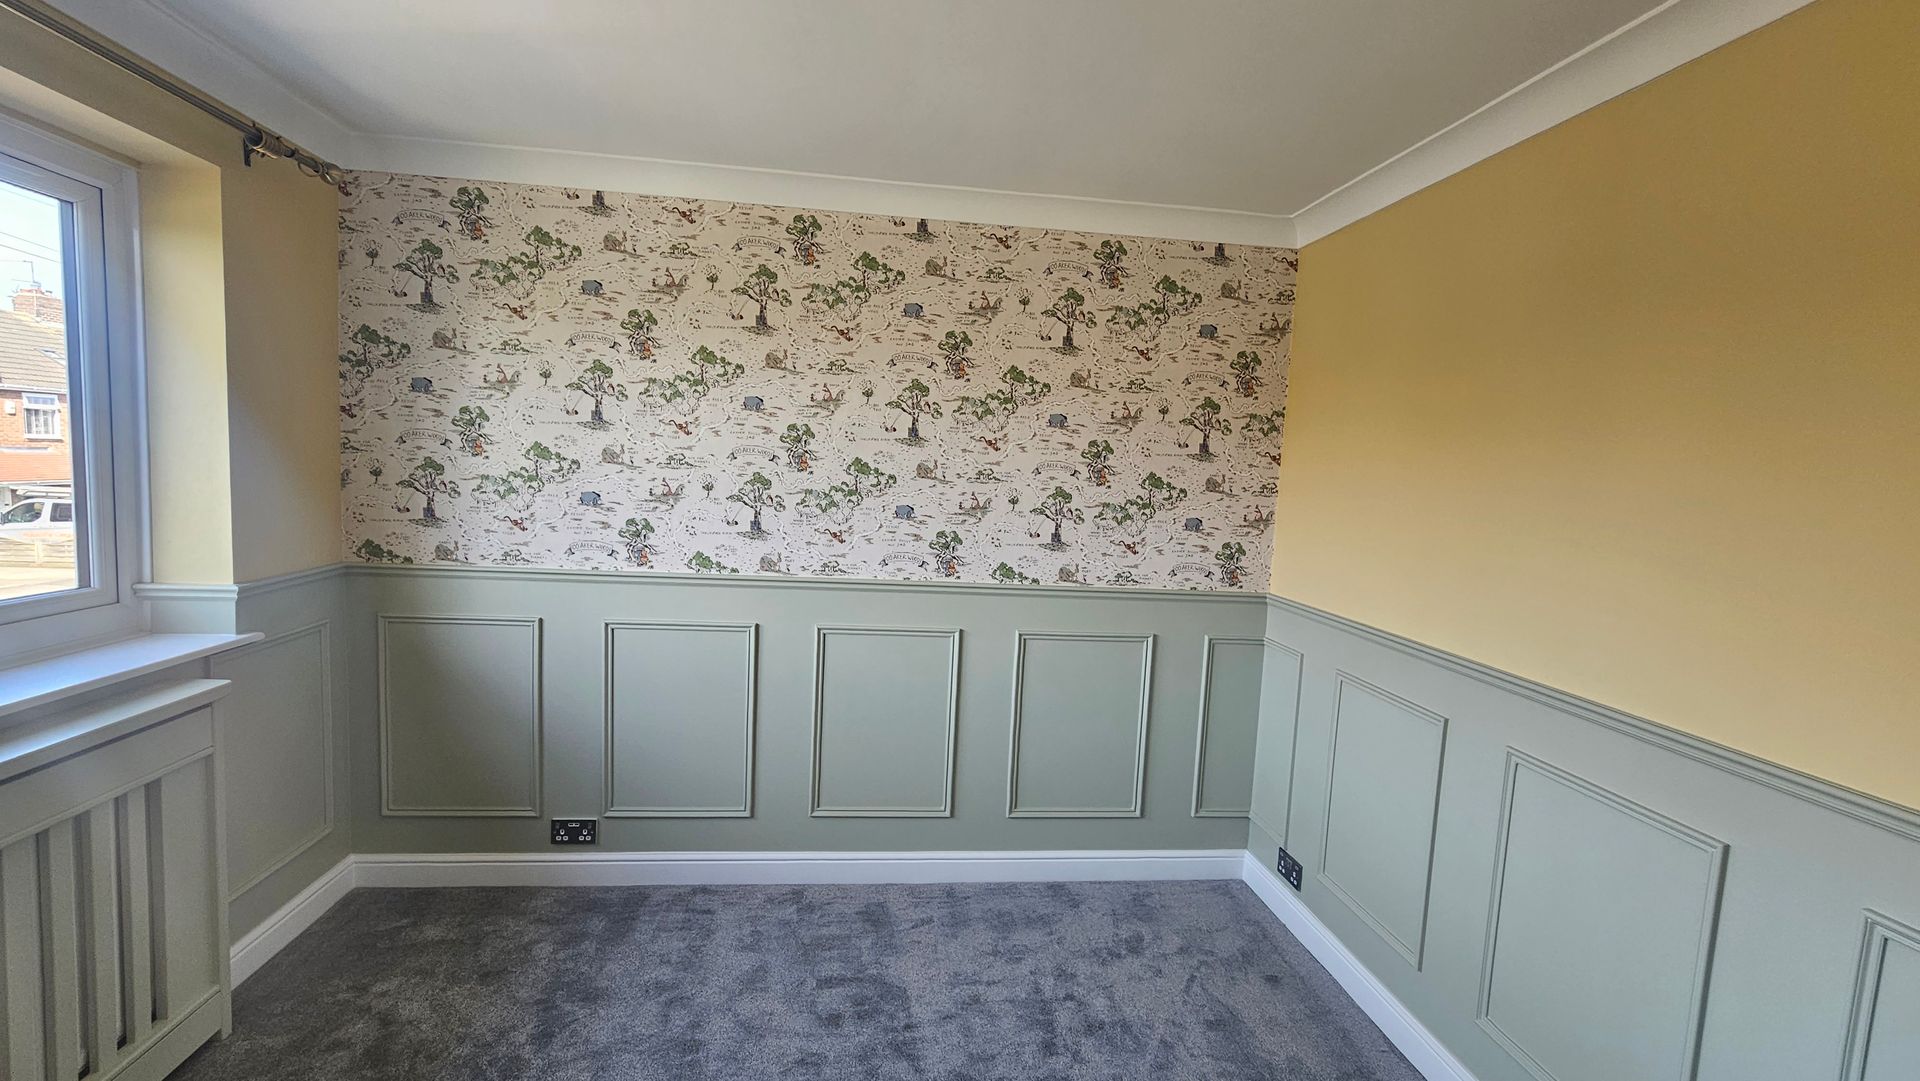
A widely used style, Shaker panelling uses simple flat panels framed by horizontal and vertical battens, usually 70-100mm wide. Plain. Geometric. Versatile.
Shaker panelling works in almost any property era because the style itself is timeless. A half-height Shaker installation in a Victorian terrace looks period-appropriate. The same installation in a modern open-plan living room looks contemporary. The difference is paint colour and bead profile (sharp square edges read modern, slightly chamfered edges read traditional).
Standard installation: 1.2m height for half-wall, full-height (ceiling minus 50mm) for full-wall. Panel widths between 350mm and 500mm depending on wall length. Top rail capped with a thin shelf moulding to give it a clean line where the panelling meets the painted wall above.
Style two: Board and batten
Vertical battens fixed to a flat backing board (or directly to the wall if it's flat enough), spaced every 200-400mm. Looks like exterior cladding brought inside, in the best possible way.
Where Shaker is symmetrical and frame-like, board and batten is rhythmic and vertical. It draws the eye upward, which can suit rooms with lower ceilings. It is also a practical option in hallways, stairwells and downstairs WCs where bags and shoes can scuff the wall.
Standard installation: full-height, with the battens running floor-to-ceiling. Batten width usually 50-70mm, spacing usually 250-350mm depending on wall length and the rhythm you want. Works well painted in a single colour throughout (panelling, walls, and ceiling) or with the panelling in a deeper tone than the wall above.
Style three: Geometric or grid
The trickiest style to fit but the most visually striking when done right. A grid of horizontal and vertical battens creates rectangular panels of varying proportions across a wall. Bedroom walls behind the bed are the most common application: the grid replaces the headboard entirely.
Geometric panelling is unforgiving. Every joint has to mitre cleanly or cope precisely, every spacing has to match its neighbour, and any wall imperfections show up immediately because the geometry exposes them. We tend to skim the wall flat before fitting geometric panelling on anything that isn't already plumb.
Cost-wise this is the most expensive style because the labour is high. Every joint has to be cut and fitted precisely, and the painting takes longer because of all the shadow lines and edges. Worth it for the visual impact, but worth quoting properly before committing.
Style four: Full-height tongue-and-groove
Vertical tongue-and-groove boards covering the wall floor-to-ceiling, traditionally in narrow boards of 90-120mm width. The look is cottage, coastal, or country, depending on the colour and finish.
Where Shaker and board-and-batten use individual elements arranged on a backing surface, tongue-and-groove is continuous: each board interlocks with the next, creating an uninterrupted panelled surface. The visual effect is softer than Shaker but more textural than flat board-and-batten.
Tongue-and-groove is often used in bathrooms, commonly at half height with a capping rail. Use moisture-resistant MDF or another specifically rated panelling board, seal the cut edges and joints, and follow the board and coating manufacturers' guidance. MDF should not be used inside a shower enclosure or another direct wet zone unless the complete system is specifically approved for that position. A sprayed finish can create a smooth, wipeable surface; our guide on kitchen cabinet spraying vs replacing covers the preparation and finish trade-offs in more detail.
Style five: Half-height with rail
Any of the four styles above can be fitted to half-height (usually 900mm to 1.2m from the floor) with a top rail that doubles as a picture shelf or simply a clean horizontal line. This is the classic dining room look, popular in Victorian and Edwardian properties, and increasingly common in modern hallways.
The rail itself can be a flat shelf with a small lip, an ogee profile, or a chamfered moulding, depending on the room's overall style. We typically recommend matching the rail profile to the existing skirting if the room has period skirting, or to the picture rail if one is fitted higher up the wall.
What drives the cost
Style complexity, wall size, paint or sprayed finish, and any prep work needed before fitting all change the figure. Half-height Shaker is the most affordable style because the panel grid is simple and the wall area is smaller. Full-height Shaker and board-and-batten step up because more material and more labour go into the wall. Geometric grids sit at the top of the range because every joint has to be cut and fitted precisely.
Tongue-and-groove costs depend heavily on whether you go full height or half height, and whether the boards are individually nailed or come in pre-jointed sheets.
Sprayed finishes carry a premium over brush-and-roller because of the masking and prep, but the result is closer to factory joinery and the per-wall premium is smaller on larger projects than on single walls.
Prep work such as wall skimming, replastering or resolving moisture problems is separate from the panelling itself. Older or uneven walls may need preparation before panelling, particularly where wallpaper has been removed or the surface has obvious dips. A good quote will set out the preparation separately so you can see what is included.
Installation considerations
Three things make the difference between professional panelling and DIY panelling: the wall, the joints, and the paint.
The wall matters because panelling is straight, and most walls aren't. A wall that bows by 5-10mm across its length is fine for paint or wallpaper but shows clearly behind a Shaker grid. We straighten walls before panelling whenever the bow is noticeable, either with packing strips behind the battens or with a fresh skim coat across the whole wall.
Joints matter because mitres rarely sit perfectly without coping or filling. Internal corners are best coped rather than mitred (the cope absorbs wall movement). External corners look best mitred but need filling and sanding. Skirting and rail joints with existing surrounding architrave need scribing for a clean fit.
Paint matters because the panel shadow lines highlight every brush mark. We almost always recommend either eggshell paint in two coats with light sanding between, or a sprayed finish for larger installations. Matt paint is generally a poor choice on panelling because the textured matt surface scuffs and marks far more than eggshell or satin.
Working with other features
Panelling rarely works in isolation. It sits within a wider scheme of skirting, architraves, doors, picture rails, and coving. The whole scheme should feel deliberate.
If you have decorative skirting, the bottom rail of any half-height panelling should match its profile or be a simple horizontal that doesn't compete. If you have picture rails, full-height panelling should usually stop just below the picture rail rather than fight with it. If you have coving, full-height panelling needs to terminate cleanly underneath the coving with a small gap or a flat top rail.
In rooms where the panelling is the main event, simpler skirting and architraves usually work best. Pair busy with quiet.
Book a free site visit
MDF wall panelling is part of our 2nd fix joinery service alongside doors, frames, architraves and skirting. We cover York and the surrounding villages, with all work guaranteed for 12 months. Our plastering and decorating services include the wall prep that often comes first, and we can quote both stages as a single package. Call 07940 099 976 or visit our contact page to book a free, no-obligation quote. Examples of our finished panelling work are on our gallery page.